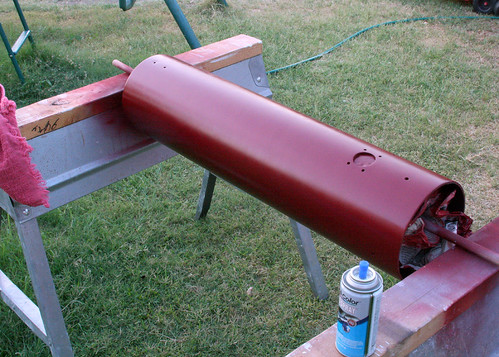
Pretty, no? I applied two light coats then set it aside to dry, with the intention of sanding lightly the next day and applying two more light coats. Then the winds came. For well more than two weeks, it was far too windy to spray paint, so I turned my attention to the telescope mount and tracking motor.
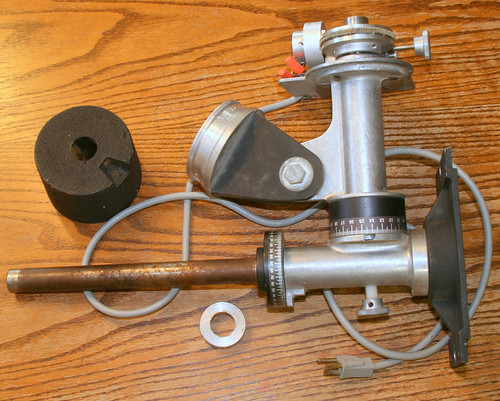
I cracked open the old motor drive to see if I could figure out a way to make it functional again. I bought the telescope used from Texas Nautical in '83, with the drive clearly described as "not working." I remember that clearly, because as a 13-year-old about to spend more money than he ever had in his life, I simply didn't care. It was more telescope than I'd dreamed of, and I didn't really understand the value of a tracking drive. So I bought it in non-functioning condition. Later, out of curiosity, I plugged the motor in. It came on with a clockwork whirr. Neat, I thought. Maybe it works after all. So I set it up on the front porch one weekend morning and let it run to see if it would track--or rather, move on its own. Six hours later I unplugged it in disappointment. It hadn't budged. That was maybe 25 years ago, and I hadn't plugged it in since.
Thanks to the kindness of the online community, I've now got a scanned copy of the Meade user's manual for the 645, which I'd never had before. There's a nice diagram of the drive system included, as well as a drive troubleshooting section. I found this helpful, and decided to plug in the drive once again to see if I could diagnose the problem. The R.A. override knob has always worked, I should point out. The plug prongs were pretty mangled, so I worked them back into shape with a pair of pliers and plugged it in. The whirr returned. I adjusted the setting circles to 0 and marked the R.A. override knob as Meade suggested and sat back to wait.
Danged if the thing didn't work. The R.A. override turned as supposed to, the motor whirred along and the tube moved. How accurately, I didn't know, since I bumped the tube a couple of times and had to start over and eventually it got too late to continue. But the crazy thing was working! The motor did change tone a couple of times, as if it was struggling, so I suspected the gears need to be re-lubed (after 25 years? You think so?).
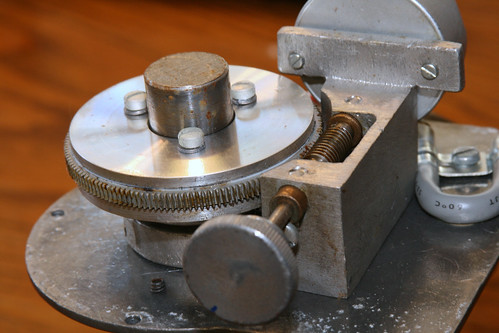
A few days later I returned to the motor. The cover had a bunch of dust and dead insects inside. Ugh. The worm gear was pretty gunky. What at one time was, I suspect, lubricant had turned over the decades into a thick sludge. Amazing that it'd turn at all. I set to work with a toothbrush purchased specifically for the job (I was afraid to use any degreasers other than detergent for fear of damaging the worm) and managed to get the worst of the nastiness out of there. Then, lo and behold, I just happened to notice one of the motor's wires crushed flat. It must've happened during the original assembly, when the cover was bolted over the motor.
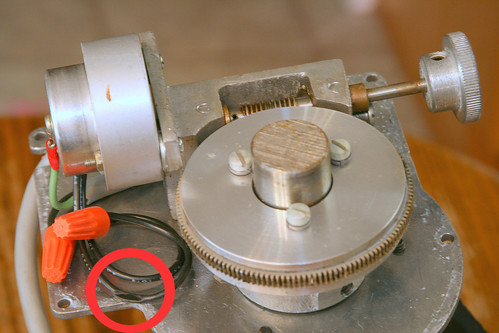
Might that be what's caused the tracking motor to run/not run all these years? Since there was plenty of excess wire, it was simple work to snip away the bad section and re-splice. I don't know if that had anything to do with the motor's not running, but it didn't make any sense for me to not effect this repair. Having previously de-gunked the worm gear a respectable amount (not 100 percent clean, but most of what's left was just discoloration) I applied white lithium grease with teflon. Then I hand-cranked the RA adjustment knob until ungreased gears lined up with the worm and repeated. By the time I'd made the full 360, the tell-tale squeak accompanying my RA turning had faded almost completely. So far, so good.
Eventually, the insane winds that had been blowing non-stop for two weeks finally died down over, and I was able to get out and spray more layers of paint onto the 645. Spray and rotate, spray and rotate. Wait to dry, repeat. The next day sand, and repeat the process. Curse like a sailor when one can decides to start spitting for no reason when it's still 90 percent full. Curse curse curse. Let dry. Sand and sand again. Repeat paint application with a new can. Finally reach the point where I say to myself "That's probably enough paint." Apply clear coat. Let dry overnight, then sand with 1000 grit paper. Apply final coats.
At this point I want to make good on my promise to explain why I didn't apply enough primer. Turns out that 220 grit sandpaper was too rough. Or perhaps the 80 grit before that, which I used to strip away the old paint. Seems that the rough sanding left grooves in the tube that weren't entirely visible when I primed, but really stood out once metallic paint was applied. Light sanding and re-painting did little to remedy the situation, and I wasn't about to go through the time and expense of sanding everything back down and starting over. I'll live with it. Just remember kids: Primer is your friend!
When applying the final clear top coat, I vigorously cursed the gnats that come out of nowhere on a kamikaze mission. Then I fled into the house with still-tacky scope. The next day, I sanded with 2000 grit paper, wiping after ever stroke since wet sanding was not an option. The tube looked good, but oddly streaky in places from the sanding. I polished with Lemon Fresh Pledge. WOW! It looked better than good. Streaks had vanished, and the metallic paint really, really shone.
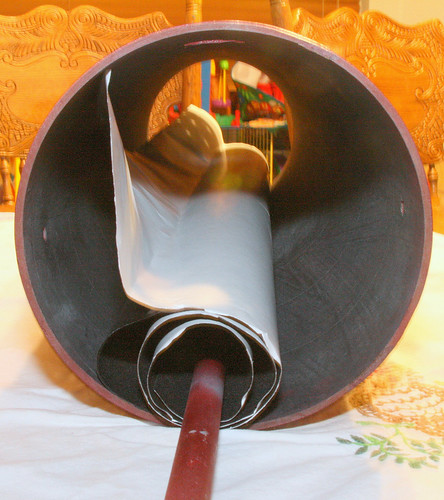
It was time to flock the tube's dull innards, so I got out my roll of Protostar flocking material (think adhesive velvet). Flocking, you see, is intended to cut down on light scatter and improve contrast during viewing. There's some debate over its effectiveness, but my scope needed something to improve the dull gray inside of the tube. The custom cut option Protostar offered came from a 30" wide roll, which was perfect for me, since my tube is exactly 30" long. I immediately discovered that rolled flocking material can attract lint, dust, cat hair and an ungodly number of bright white flecks of... stuff like nothing else. So I whipped out the sticky tape and spent the next hour trying to get it all picked off. I was mostly successful, but man, was that tedious. Then I clothes pinned the flocking material to the inside of the tube, marked it for a 1" overlap and trimmed off the excess (about 3" worth. I ordered extra to guard against coming up short). Then I rolled the material up on a thick wooden dowel, peeled back the wax paper backing, and began installing. Here's a before shot:
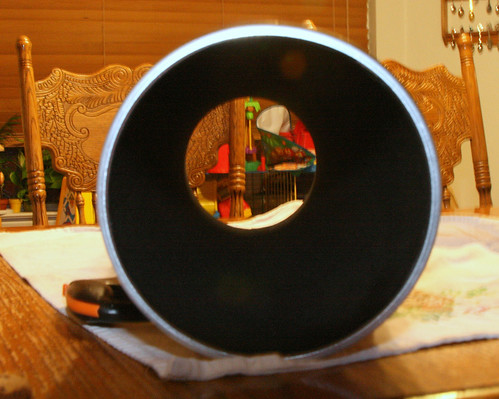
You'd think that since it sticks to the wax paper like nobody's business, it'd really hang onto the tube. Eh, not so much. At least not until you get about half of it laid down, at which point the paper is clogging up the tube so much you can't really reach anything. So the logical thing to do is tear away the paper, right? Just make sure when you do this, you don't allow the sticky side of the flocking material to come into contact with itself. In the immortal words of Elwood Blues, "Epoxy. Strong stuff." When I finally managed to separate it, somehow the adhesive had stripped from both sides of the affected patch. Where'd it go? Maybe I inadvertently created a dimensional rift. In any event, I finally got it all laid in, and despite my struggles, it looks pretty good. Here's the after shot:
With the tube completed, I turned my attention to the spider. In the image below you can see the secondary mirror spider, along with three bolts. To the left is one of the original specialized aluminum bolts used to secure the spider to the optical tube. As I mentioned earlier, one of the bolts snapped on me a few years back, and I hadn't had any luck finding a replacement. So I made one of my own (center). I picked up some thumbscrews from a local hardware store and using a hack saw, a file and a 6x32 drill tap, cut the thumbscrew into a passable substitute. Then I primed it and sprayed everything matte black. I can't take all the credit, though--this guy restored a Meade 826 a few years ago and faced some of the exact same issues I'm dealing with. My secondary housing didn't appear to be in as bad of shape as his, but in a few years, I'll probably spring for a whole new spider vane/secondary rig. Probably a new secondary mirror as well, as mine is starting to show some streaks.
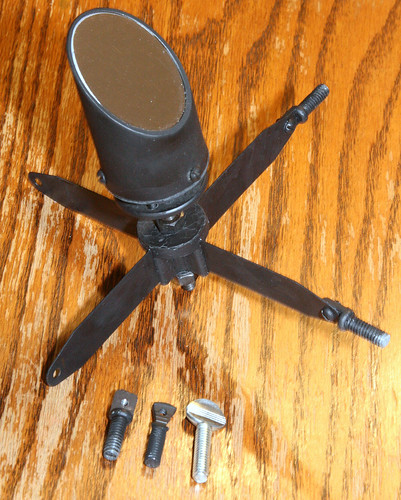
The spider fastener was the single biggest issue I had to deal with to get the scope usable again. And I'd triumphed!
The time came to put everything back together. The primary mirror went in easily, as did the spider. Suffice to say, it was wildly out of collimation. I had to wait a few days until the sight tube/cheshire collimation tube I ordered came in, and then I had Apollocon intervene, so collimation had to wait. In the meantime, I painted some black trim and installed the spotting scope and focuser. I took the two aluminum end rings, which had gotten pretty dull and dinged up, and wet sanded them with 2000 grit paper. That perked them up nicely. The felt lining the cradle rings had become hard and brittle, so I stripped this out and used a utility knife to chip away the petrified glue. Then I sanded with 400 grit paper to smooth the inner surface somewhat. I picked up adhesive felt sheets from Hobby Lobby and cut strips which I applied to the rings (although in hind sight the leftover flocking material probably would've done the job as good or better).
I returned the end rings on the scope and used pieces of flat cork to try and avoid having to glue them on. Well, the cork secured them on all right, but even the thinness of the "shim" was enough to distend the end ring. And, I feared it might eventually warp the tube as well. So I pulled both end rings off (no small feat--the cork held them on tight) and added a strip of that adhesive felt to each ring. This proved to work much better. The rings slide on more smoothly, but still maintain a firm grip without any distortion. It may get loose later on with use and age, but I can always add more strips of felt along the interior of the ring.
I reattached the mount to the pier, and set the OTA in the cradle rings. Then I added the counterweight. And I plugged it in. After four hours, a quick setting circle check showed movement of.... four hours. Obviously, that's not a test for precision accuracy, but after having this scope with no tracking whatsoever for 25+ years, the prospects of having a working drive leaves me positively giddy.
Oh, I also re-painted the black motor cover.
For collimation, I took the whole thing onto the back patio and set to work. Wow. This thing was waaaaay outta wack. The secondary mount in particular wasn't playing nice, so I had to take it completely out to work on it. The adjustment screws wouldn't turn, and it took a bit of coaxing before they'd cooperate. The secondary mirror looked as if it'd come slightly dislodged, but the ancient housing was corroded and brittle so that I couldn't get it apart to address that issue. The mirror wasn't loose, just slightly out of position. And on closer examination, the secondary mirror was in somewhat lesser condition than my original evaluation. The whole secondary/spider shebang will definitely be due for replacement eventually, but I can coax a little more mileage out of them yet.
Using the sight tube I got the secondary mirror positioned and aligned, then the cheshire made the primary collimation a snap. I was very happy with how that went. There's still a slight discrepancy in the collimation when looking through the sight tube--the two innermost circles are somewhat off-center in regards to each other, an effect I ascribe to the secondary mirror being slightly out of position, forcing the secondary mount to hold a steeper angle than ideal in order to compensate, thus showing a larger silhouette than ideal. In any event, I couldn't do anything about it at that point, and judged it wouldn't have a dramatic impact on my initial viewing anyway.
Holy moly... the scope, she is done! For reference, her is one of the few images I have of it pre-restoration:

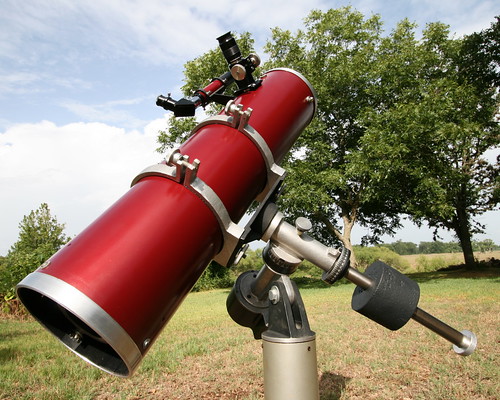
And the finished product. Behold the Maroon Barsoom:

And the wide-angle view:
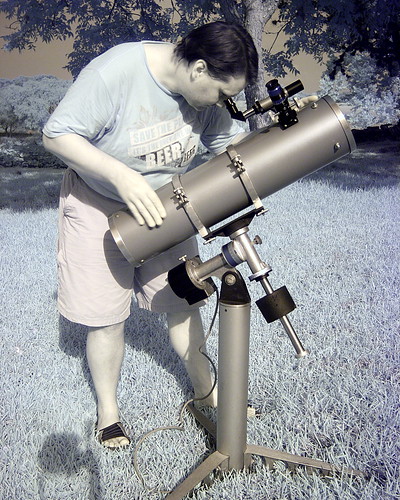
And an infrared view of your humble telescope restorer along with the fruits of his labor, in glorious false-color, just to shake things up a bit:
Join us next time for the obligatory "first light" report!
2 comments:
Hi there! Very nice review of a great work you did!
I'm the proud owner of the same scope. What i don't understand is how to use the 'R.A. override knob'. It's supposed to correct the automatic R.A. but the gear blocks any movement. Do you have to pull it out before turning?
Thanks for any help!
Bruno, Switzerland
Bruno! My apologies--I just now noticed your comment. Last year I got an Atlas mount for my scope, so the original Mead pier has gone into mothballs. But if I recall correctly, the RA knob only worked in one direction. I could turn it to move the scope forward in its tracking, but turning it the opposite way had zero effect. There are scans of the original Mead manual online. If you can't find it via Google, message me and I'll send you my PDF copy.
Post a Comment